Initiating an eMail inChorus Message
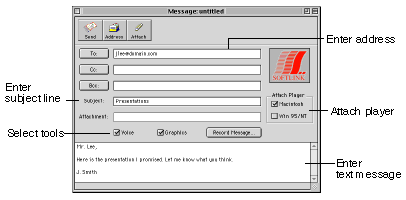
When you start eMail inChorus or select New Message from the File
menu, the main window appears. This is where you initiate eMail
inChorus messages.
On the main window you can perform the following initial tasks:
- Address the message
- Attach an eMail inChorus player
- Attach a file to the message
- Select message tools
- Enter a text message
The procedures for each of the initial tasks are explained in
the topics below.
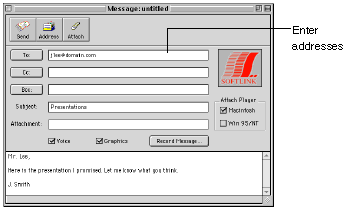
Addressing Your Message
Similar to other email programs, eMail inChorus allows you to
enter destination addresses for To , Cc , and Bcc recipients.
To address your email:
- Enter a To address.
You can type an email address in the To: text box or click the To: button to access your address book. (Clicking the Address button also opens your address book.)
See Using the eMail inChorus Address Book for more information on using address books.
- Enter a Cc address, if applicable.
You can type an email address in the Cc: text box or click the Cc: button to access your address book.
-
Enter a Bcc address, if applicable .
You can type an email address in the Bcc: text box or click the Bcc: button to access your address book.
-
Enter a subject line
Type the subject of the message in the Subject: text box.
-
Enter an initial text message .
Type a text message for your email in the text box. Your message
recipient does not need an eMail inChorus player to view this
message.
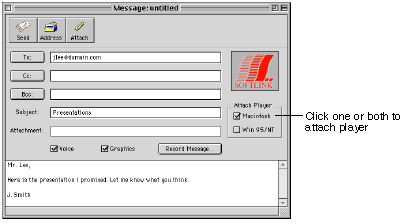
Attaching a Player to Your Email
With eMail inChorus, you don't have to worry about your email
recipients having the correct software to view your message. You
can attach an eMail inChorus player to your message by checking
the appropriate computer platform box on the main window.
When your recipient opens the message, the player automatically
installs on their computer. Once a person has a player installed,
you no longer need to attach a player when you send them an eMail
inChorus message.
Attaching Files to Your Email
eMail inChorus allows you to attach files to your email, as well
as attach files to the Whiteboard. A person receiving a file attached
directly to the email does not need the eMail inChorus player
in order to see the file.
To attach a file your eMail inChorus message:
- From the main window, click the Attach button. The File Attachment dialog box appears.
-
Click Attach File . A file directory dialog box appears.
-
Select a file and click OK .
-
Repeat steps 2 and 3 for any additional files.
-
When you finish attaching files, click OK on the File Attachment dialog box.
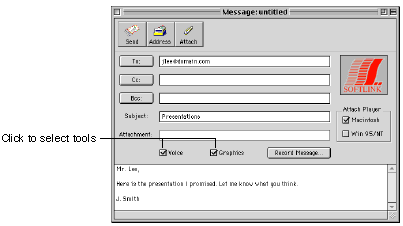
Selecting Message Tools
eMail inChorus provides the option of creating a voice message,
a message with graphics, or a message with both voice and graphics.
By selecting message tools on eMail inChorus' main window, you
control the type of message tools displayed when you click the
Record Message button.
When you want to create a message with a just voice recording,
select the voice check box and click Record Message. Only the
audio controls appear when this is the only option selected.
When you want to create a message with graphics on the eMail inChorus
Whiteboard, select the Graphics check box and click Record Message.
The Whiteboard template selection windows appears.
Selecting both voice and graphics activates both the recording
controls and the drawing tools on the Whiteboard.